Friday, October 12, 2012

Re-doing the cabin sole

Koan's cabin sole was upholstered in a non-skid patterned vinyl that was dirty and disgusting. I'd seen photos of other IFboats with that removed and I was really aching to get it off mine.


The removal of the vinyl lining from the insides of the hull and the plywood floor boards was annoying enough as it was. But it turned out a huge challenge lay further ahead. The vinyl had been glued on with a disgusting green glue that was resistant to most everything I tried on it. Three glue removers did nothing, and acetone worked, but required huge amounts. Finally, a couple months after avoiding the subject, I decided to try Franmar's Soy Strip. This is the stripper that saved my ass when I re-did Shadow Line's deck back in 2007-2008, and I should've thought of it earlier, except that it's intended for much much more tenacious things, like anti-fouling paint. In any case, Franmar to the rescue! A couple days later I had the majority of the green glue off, and I wasn't the worse for exposure to VOCs, since Soy Strip can be handled without much protection. In the process I did accidentally get some of the stripper on other wooden surfaces in the boat, so some of those will need to be stripped and re-varnished, but one could argue that needed to be done anyway.


I wrapped the floor boards in a natural cork liner that I don't think is going to hold up too well. But there wasn't much choice, as they were completely coated in the disgusting green stuff. I didn't reinstall the holes for the table or the tabs for pulling up the floor boards, since those are all superfluous. Now I just need to go over the hull sections and remove the remaining bits of glue with acetone and a towel...

Monday, August 20, 2012

Weekend trip to Diablo anchorage

This weekend Kitty and I went for a short trip to Santa Cruz Island and back. The forecast had been for  not a lot of wind, so we had planned to arrive at the west end of the island, then sail east along the coast checking out the various anchorages. I was hoping to anchor at Lady's cove. It turned out that there was actually quite a lot of wind once we got within 5 miles of the island, probably close to 18 kts with 4 ft swells. We made landfall a bit east of the west end, then sailed wing-on-wing, past Cueva Valdez, which only had one boat, to Lady's, which was occupied by two large sailboats and a fishing boat, leaving no room for us. So we continued east to Diablo anchorage, which only had one other small boat anchored at one end, and stayed there.

On the first part of the sail to the island we only had about 10 kts of wind, so Kitty took the opportunity to test her aerial photography kite. The kite looks like this:

and then she added the camera on a rotating base, which looks like this:
We got lots of photos of the surface of the ocean, and a few cool ones of Koan, like these:


The anchoring was uneventful, and we had a very nice dinner. Unfortunately there was a lot of surge in the anchorage, and I didn't sleep very well in the rolling boat. But I woke up happy that we had not had any anchor alarms during the night.

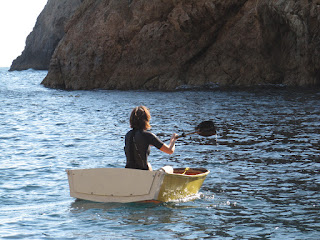
The Sunday morning project was to test the launching of the dinghy from the foredeck. That wasn't a problem, and I paddled it around the cove to make sure it didn't take on any water.


I took some photos of Koan anchored:


Then Kitty took over the dinghy and I went snorkeling, and out on the beach to explore it, and to meet our neighbors:

After we dried off, we read a little, and then, when the wind really picked up (because we like maximum difficulty) we planned our de-anchoring and exit. We had lots of wind on the way back, so we kept the main reefed most of the time and still made 7 kts over ground. We made it back in 4 hrs, which is my personal best record so far!

Tuesday, July 10, 2012

Another fantastic sailing movie

I've previously posted about "Hold Fast", one of my favorite sailing movies of all time. Well, it's time to add another much anticipated release to the list! I followed Nick Jaffe's trip across the Atlantic and the Pacific through his website BigOceans, and actually learned a lot in the process. Now Jack Rath has made a documentary called "Between Home", which you can download here, from Nick's footage before and during his passages. I watched it the other night and I loved it. I thought it was honest and beautifully shot, and really those were the two things I was looking for. It's not prettified and it's not what I would call a happy ending, or a happy anything, really, movie. It was true to the sense I've gotten from reading the writings of and chatting with other people who've pulled off similar things. Highly recommended!

Monday, July 2, 2012

The custom dinghy


I've wanted a hard dinghy that's small enough to fit on Koan's foredeck, and big enough to carry one or both of us and the dog from the boat to shore when we're out at the islands. When someone posted a free Naples Sabot on craigslist, I jumped at the opportunity. The Sabot is 8 ft long, and we only have about 6 feet of length on the foredeck, before the dinghy starts to interfere with the anchor cleat. In addition, the cabin is in the way, and the dinghy can't lie flat. I didn't like the idea of it sitting on top of the cabin top, because it's difficult to stabilize it by tying it down, and it's also very high, with a lot of windage. So the obvious solution to all our problems was to shorten the dinghy and build a custom transom that fits around the cabin top. 

I used 3/8'' ACX plywood, which I screwed in at three places, and two layers of fiberglass tape. Then I painted everything, and made an overlapping transom piece that screws in with 5 bolts, tightening around a thin rubber strip to make it water tight. 

It seems to work!

Sunday, May 13, 2012

Wednesday, April 4, 2012

Time lapse videos from the trip

During our recent sailing trip to Santa Cruz Island we had the use of Dan's Hero HD camera with a waterproof enclosure, so we took some time lapse photography series. The settings were for 720p every 30 seconds, and I compiled them at 1 frame per second at lower resolution.

The first time lapse is of our first morning at anchor. We're having breakfast and doodling around. The water's too cold to go snorkeling, so we're kind of boat-bound. I think that in these circumstances the boat is very much like a super comfy portaledge.


The second time lapse is of us motoring towards our next anchorage that afternoon. The island is to our left and we're checking out all the cool caves we're motoring by. A bit after the battery ran out things got interesting, as the wind kicked up right on our nose.


The third is of us sailing away from the island the day after, but after all the excitement of putting away the anchors and sailing through the windiest bit is done for. At some point in this time lapse we shake out the reef in the sail, as the wind drops, then switch to motoring when the wind dies completely.


The final video is on that same leg, when the wind comes back up, from the opposite direction, when we're about 5 miles offshore of Santa Barbara. At this point we have water or some other kind of gunk on the camera's enclosure, so the view is a little blurry.


This was my first experiment with time lapse, and I had a lot of fun. It saves battery power compared to video (i.e. you can get a longer time lapse series than you can shoot continuous video on the same amount of battery power) and it's better at showing the motion of the boat through the seascape around it. Since the Hero is mounted on a fixed point in the boat you lose all sense of the boat's side-to-side motion, which is considerable, but you can get that back by focusing on any object on the boat that's hanging, e.g. the gloves or a mug on the lifelines, or a line off the spreaders in the first video. Of course, unlike in video, there is no sound. I could've stuck a sound track on these, but I wanted to try them out on you raw first. What do you think? What stands out? Does it look like what you thought things would look like on a small boat?

Tuesday, April 3, 2012

Gear abuse

Because this was the Origo stove's first trip, I wanted to have a backup stove in case that didn't work. Also I was imagining an outside stove and an inside stove situation, so that if we felt like hanging out in the cockpit we wouldn't have to, you know, commute five feet into the cabin to check if the water's boiling. I don't know, explain it however you like! I was just over-prepared, as usual.

So I brought along my beloved pocket rocket, plus a hanging kit for a jetboil that I found on sale at some point. The hanging kit doesn't work properly for the pocket rocket, but, well, we're equipped with all sorts of fun things on board, including fancy $10/roll Monel bailing wire, essentially. So I wired the stove to the hanging bracket. The plan was to suspend it from the backstay like so:

So I did and I put a pot of water on it, and lit it and let it do its thing, until the pot came crashing down, and when I looked up at the stove I found that the skeleton had bent.
I think the way I suspended it had the skeleton a bit too close to the flame, and as it warmed up it became softer and it eventually warped. The good news is that I'm so strrrrong that I was able to bend it all back into shape. For what? The next experiment in gear abuse, I'm sure.

Thumbs up gear

Some of the new gear on the trip proved to be worth their weight in gold.


For example, the Origo 1500, equipped with potholders and sitting in a custom cabinet that I built for it, was a smashing success. People had warned me that alcohol stoves burn too cool and too sooty, propane is better, etc etc. Aside from filling the alcohol canister from a jerry can of alcohol, which was difficult and wasteful, we had no problems with the stove. We used a long-nosed lighter to start it, and it started and ran reliably, quietly and effectively. We had one $25 aluminum pressure cooker and a $10 aluminum percolator kettle, minus the percolator. The pressure cooker fit with the pot holders at max and the kettle with the pot holders at the minimum of their expansion range. Both worked beautifully, and we had no hesitation using the stove whenever we needed it -- partly a safety concern in a cold environment.

We had no problem using the iPad in all conditions with
the CaseLogic case.
One of our tech toys, the CaseLogic water resistant iPad case, got put through its paces and worked really well. Aside from paper charts, we wanted to use the iPad with iSailGPS to automatically plot our location on scanned charts. This setup worked really really well. The iPad acquires a satellite signal faster than any other GPS I've ever used, so it was really easy to pull it up to the cockpit and do our work on it without worrying about how much spray we had coming in at the time. The touch screen works well right through the case and the clarity is quite good. As a bonus, the case protects the iPad from scratches and also pads it a little, for when it gets knocked around.

Finally, we only had one chance to use the GoalZero Nomad 7 solar panel to charge the Hero HD's camera, and that was in cloudy conditions. The charging light stayed on, and indeed the battery got some charge, but we had low expectations in those conditions and we didn't log how long we charged it or how far it charged.

Monday, April 2, 2012

Thumbs down gear

Woohoo! We're back! We had an awesome time!

First off, some of what didn't work. We had two "exciting" gear failures and one that didn't surprise us at all.

The unsurprising one was a part failure on the new tiller. The old tiller has a metal "knee" that braces it against the rudder. It's for convenience, rather than necessary, since the tiller works just fine without it, but can chafe on a coaming. So the knee just keeps it off that coaming. I didn't want to remove the part from the old tiller and put it on the new, since I want to keep the old tiller as a backup. I don't know how to mill a metal one (that's the new project as a result of this), so I made one out of walnut wood impregnated with penetrating epoxy. It broke within minutes of sailing. Oh well! So Kitty taught me how to make some chafing gear to protect the tiller where it rubs on the coaming, and here it is:

The new chafing gear.
Otherwise, the new tiller was a huge thumbs up!

The other two gear failures were annoying and scary, respectively.

The most annoying one concerned WAG bags. These are a double-bag human waste disposal system, in which you pee and poop into an inner bag that contains a gelling powder, then wrap it all up in a leak-proof outer bag for packing out and disposal. We were planning to use these over a bucket for the trip, so we wouldn't have to have liquid waste on board, which can be tricky on a small boat that pitches around a lot. We had a dozen WAG bags that came with the boat, among which one had already been opened, presumably for inspection by the former owner. We used that one first and everything was fine. On the second day, when it came time to use a second, I discovered that the unopened WAG bag packages were a little different from the opened one. Those contained a biodegradable inner bag. However, their packaging, which was heat-sealed plastic, was not sealed all the way on all of them. So all of the inner bags had biodegraded from exposure to humidity. We had no inner bags, and the outer leak-proof bags were too small to use directly! Boo! We had to bucket and chuck it from that point on, which made us sad. So don't store WAG bags in humid places! WAG bag company, listen up: heat seal those packages! Quality control, baby!

The other gear failure was a little more disconcerting, rather than inconvenient. When we left the islands for the mainland it was blowing 20ish kts, with a big swell and we hadn't slept that night, so I thought tethering up to the boat was a good idea. When I got done cleaning up anchors after our departure I went back to the cockpit, and, as I was stretching and kind of re-arranging my chest harness, rrrrriiiip, it tore! I knew that chest harness was old, it looked pretty tired, but I was so mad at myself for not putting it to a serious test before trusting it. These chest harnesses are made of white nylon webbing, sewn around stainless steel hardware. The construction is very similar to that of a simple climbing harness without padding. But, where climbing harnesses are subject to abrasion and sunlight damage, sailing harnesses are subject to saltwater and sunlight damage. Well, apparently, this one was toast. I should point out that this is not the fault of the manufacturer, but squarely on my shoulders. I do not even remember where this harness came from, and I knew it was suspect, but, like I pull-test my climbing gear placements when the stance permits, I should have pull-tested this harness before trusting it. I switched to wearing a life jacket after that.

Taking off the torn harness.
Of the newly purchased gear we wanted to use on this trip, only one thing didn't work out. The DicaPac WP310 for my Canon S95 was ill-fitting, in spite of being the size recommended on the company's fitting guide. This resulted in a black halo around the pictures I took with it. Also, the silica pack they included was useless for keeping the interior from eventually fogging up. Thumbs down!
You can see the black halo from the ill-fitting lens barrel on
the DicaPac PW310 used with a Canon S95.

A bit about what worked well in the next post!

Monday, March 26, 2012

Storage on board

One of the really fun things about this boat is that, in spite of technically being very small, it's big enough to fit everything you need. For example, with two people, gear and food for 4 days, we still have room to carry a full extra set of sails. They go below the cockpit, as you can see in this picture.


We're carrying 11 gallons of potable water, and a 5 gallon solar shower. Here is 6 gallons of our water storage, under the v-berth, on top of foam pads, to prevent the bottles from cracking if we slam into waves.

Sunday, March 25, 2012

Touch & Throw: sewing machines for sails

I know I promised a post about safety on board, but it hasn't happened because I got distracted working on the sails.

I originally started trying to modify the head of the jib with my Kenmore $100 sewing machine. But that was too much for it, so eventually that machine became de-timed when I forced it and a plastic gear slipped.

Last Monday I went trolling the local thrift stores for a replacement machine, and came home with a Singer Touch & Sew 648 for $30. I'm told these are affectionately known as the Touch & Curse or Sew & Throw, and now I know why. After waiting 4 days for the appropriate bobbins and foot to arrive from Ebay, and oiling and greasing the machine, it took approximately 5 minutes to destroy one of the top-end gears, which are made of nylon. Granted it was probably really old, and nylon ages badly, but even so, it would have been nice if that had all happened before I'd spent the extra $25 on manuals, accessories and oil.

So Friday night, minutes after breaking the Touch & Curse, Kitty and I headed to the thrift stores once more, and came up empty, so we stopped by Sears and picked up a new Singer Heavy Duty for $200. The reviews on Amazon are not stellar, but we figured, what the heck, at least we can return this one. Between the original Kenmore and this machine, we managed to finish the really critical bits of sewing, although not until after we hacked the HD. It turns out that it's common among low-end modern machines for the bobbin thread tension to have been set at the factory, and to not be tunable. To work on this heavy project the bobbin thread tension absolutely had to be fiddled with, so we broke the factory seal (a drop of glue on the setting screw) and did it. That's what allowed us to complete the job. In other words, as configured by the manufacturer, the HD was also useless.

Last night I decided to work on extending the mast climbing ladder. This project requires sewing bar tacks across two layers of webbing. The HD made three seams and then became de-timed on the third. I did not take it apart to see whether it had actually stripped a gear or merely slipped one. I unceremoniously boxed it back up and returned it for a full refund this morning.

The conclusion appears to be that to work on these projects we need a minimum of an all-metal-geared sewing machine, with zig-zag stitch, preferably a slow one. (One of the HD's most frustrating features was its extreme high speed!) The types of machines properly intended to sew sails on also have a walking foot. My research indicates that a number of old school Singer machines with all metal gearing would be able to handle some of our projects without becoming de-timed. These include the 237 (Fashion Mate), the Slant-o-matic 400, 403, 500 and 503, and the 306k and 320k. I'll keep an eye out for one of these, and if you know anyone who needs a Touch & Throw or Kenmore for parts, please let me know! It's beginning to look like a sewing machine graveyard in here!

Thursday, March 22, 2012

New handrails

If you recall, one of the must-do projects that had to be completed before our upcoming trip was the installation of new stainless steel handrails to replace the original teak ones. Et voila!
These were purchased online, arrived slightly bent and were incredibly difficult to install, because they required drilling 4 holes at a 45 degree angle to the cabin roof, which is not the flattest place in the world, itself! I had to fabricate little chocks so that the fasteners would have a flat surface to lie against inside. This is one of them:
In any case, they're done, and the stainless fabricator, who came by today to spec out a different part I'd like him to make for me, approved of the installation. These are only one part of a multi-component safety system on board that also includes the life-lines (or trip-lines, depending on how tall you are!), the jack-lines that run from the bow to the stern, and the lanyards that connect the jack-lines to the chest-harnesses that the crew wears whenever there's a danger of going overboard. I'll be writing more about how we stay safe while sailing tomorrow!

Wednesday, March 21, 2012

A boat by any other name?

A boat by any other name would sail as well. Or would it? Most sailors would probably strenuously object to the statement! We think the names of our boats say everything about them and about us.

My previous boat was named the "Shadow Line", after a novel by Joseph Conrad about a young captain's first command. (The boat's old blog is now defunct, but I'll try to take the blog entry about choosing her name off my backups and repost it on the second Shadow Line blog.)

I've raced on Joie de Vivre, Bullet, Escapade, Phantom, Fatuity, Prevail, Near Miss, Summer Wind... I sailed on Nevermind down from San Francisco. Don't try to tell me the owners didn't think those names were important! Other favorites of mine: S/V Nomadness and S/V Pestilence. And lest we forget my other loves, space and SciFi, think of the names of space ships, especially in imaginary universes, like the Culture from Iain Banks novels (among which the "Very Little Gravitas Indeed" probably takes the cake for me).

And so we get to Koan, with or without the little line above of the o. When we bought her (you know that boats are always female, right?) her name was Cosimo, after Italo Calvino's "The Baron in the Trees". I suspect the former owner had an affinity for that character, but neither Dan nor I especially liked what we read about him. I later found out that an even earlier name of our boat had been "First Light", which I love, but this came after our decision to rename her.

Had I bought the boat by myself, the name would have been "Anemone" which is a play on the Greek words for wind (anemos) and alone (moni), but since Dan and I bought her together, I argued that we should name her jointly. We threw around a lot of ideas and "Koan" stuck. We conducted John Vigor's interdenomination boat re-naming ceremony and the deed was done! When we tell people the name we get one of two questions, either "how do you spell that?" or "what does that mean?" As to the spelling, all the traditional caveats of transliterating the sound of a word representing a religious principle that crosses cultures apply. Some might spell it Goan, some think the little line is more important, and in America you'll often hear it pronounced "cone", which is quite far removed from the long o and separate a that I think is technically right. For a definition I can refer you here, but here's my short take on it: A koan is similar to a parable, in other words a story told by an elder to his or her disciples to help them figure out the truth of things. Specifically, koans were told by Zen elders to Zen disciples. They are not, as Christian parables often are, based on analogy, but rather are meant to help the disciples hone their intuition. Dan and I thought that was a very apt name for a sailboat, since we feel that, while sailing can certainly be done by the numbers, there is always a part that is lacking unless you apply your intuition. Also, sailors, being a bunch that loves life deeply, love to tell stories, and we often think our stories are deeper than they sound, which is very true of koans.

Tuesday, March 20, 2012

Gear testing on this trip

This upcoming trip will be an opportunity to test a whole lot of gear I've recently purchased, and also a couple things I've made myself. I'll write about it here and on my review blog, IfPressed.

In no particular order I am planning to use the following new gear:

GoalZero Guide 10 Plus Adventure Kit
I'm really excited about this purchase. I had ordered a different brand of solar panel capable of charging the iPad last fall, but that company was having trouble with their product manufacturing in China, so they couldn't get their product to me before the trip on which I was hoping to use it. This GoalZero Nomad 7 panel should be able to not only charge the iPad, our camera batteries and AA batteries, but also trickle charge the double-battery house bank, via the 12 V output.

CaseLogic water resistant iPad case

DicaPac WP310 waterproof digital camera case

My iPad and my Canon S95 are both prized possessions, and I would hate to see either hurt. But we'd like to shoot a lot of video, and the iPad will be our primary chart tool, so it's important to keep them both protected and tethered to the boat.

By the way, we'll be using two iPad apps for navigation on this trip, so you can expect to read more about them, too: iSailor and iSailGPS. My trusty Garmin 76cx will also be in play, of course.

I'll also be using the Origo stove for the first time in the field, in combination with a pressure cooker. I've heard that pressure cookers can be especially good on a sail boat, as they cook faster and they are closed tightly, making them somewhat safer in a potentially tricky environment.

Finally, we'll also be switching to full time use of the new tiller I that Dan and I made last fall.


(Note that these items were purchased with my own money and NOT provided by the companies that make them. My opinions and reviews are, as always, my own.)

A fantastic home-made sailing adventure movie


Hold Fast from Moxie Marlinspike on Vimeo.

Some day I aspire to make something this good!

Monday, March 19, 2012

Getting ready for an islands trip

The project area of the living room
Even though it's a crazy busy week at work, it's also time to prepare Koan for a trip to the Channel Islands that, weather permitting, we'd like to take next week. I thought this time around it might be fun to make the trip more participatory, so I'm going to be updating the blog more frequently during the preparations, and then we'll be posting location updates via SPOT while we're out there, and hopefully we'll be able to post lots of pics and video when we get back. My friend Kitty, who is a geographer and adventurer extraordinaire, will be joining me, and we may be taking out for a spin some exciting gear like a kite for aerial photography and a hydrophone, for recording underwater sounds!


At the moment I'm categorizing the unending list of projects in order of importance, and deciding which absolutely must be done before we leave the dock, which can be left undone altogether, and which we can do while we're out at the islands. 
Must do:
* install the cabin-top hand rails
* do the machine sewing on the jib and genoa
Can be done out there:
* finish the hand-sewing on the jib
* install the GPS main battery cable
* eye splice the new main halyard
Can be scuttled before this trip, but would be nice to do:
* dinghy build
* table extension over port berth
* chain locker closure
* move hanging locker from port to starboard (?)
* extend mast climber
* replace cabin ceiling & stbd bulkhead lights w/ LED


One of the big jobs we've started is the re-cutting of the jib to make it fit the furler. We began sewing the re-cut jib together on my cheap and weak and plastic home sewing machine, which eventually broke from the strain. So I spent yesterday trolling the thrift stores for a used stronger sewing machine that can do a zig-zag stitch, and came home with a Singer Touch & Sew 648. The machine cost $30, the service manual $10, new bobbins and a foot another $10 (arriving later this week, I hope), and I still need to pick up some sewing machine oil. Hopefully, after oiling, greasing and re-assembling it, I will have something capable of completing the remaining sewing of the sails, leaving us with only the heaviest of the sewing to do by hand. 


In the meantime, I'm compiling lists for everything. We have:
* a list of equipment for each crew member to bring
* a list of equipment that doesn't live on the boat but should come along for the trip
* a list of manuals & books that we want to have on board
* a list of things in our med locker
and many more. So over the next days I'll be sharing some of those checklists, as a way to give you some insight into the kind of preparation that goes into a ~4 day offshore trip. 


Welcome aboard! 
I leave you with a Koan: The real miracle.

Sunday, March 18, 2012

New v-berth cushion

My friend Bee helped me construct a new v-berth cushion. Here it is!
It's going over the boards I made several months ago. This is the ideogram for Koan.